Settings
Settings Basics
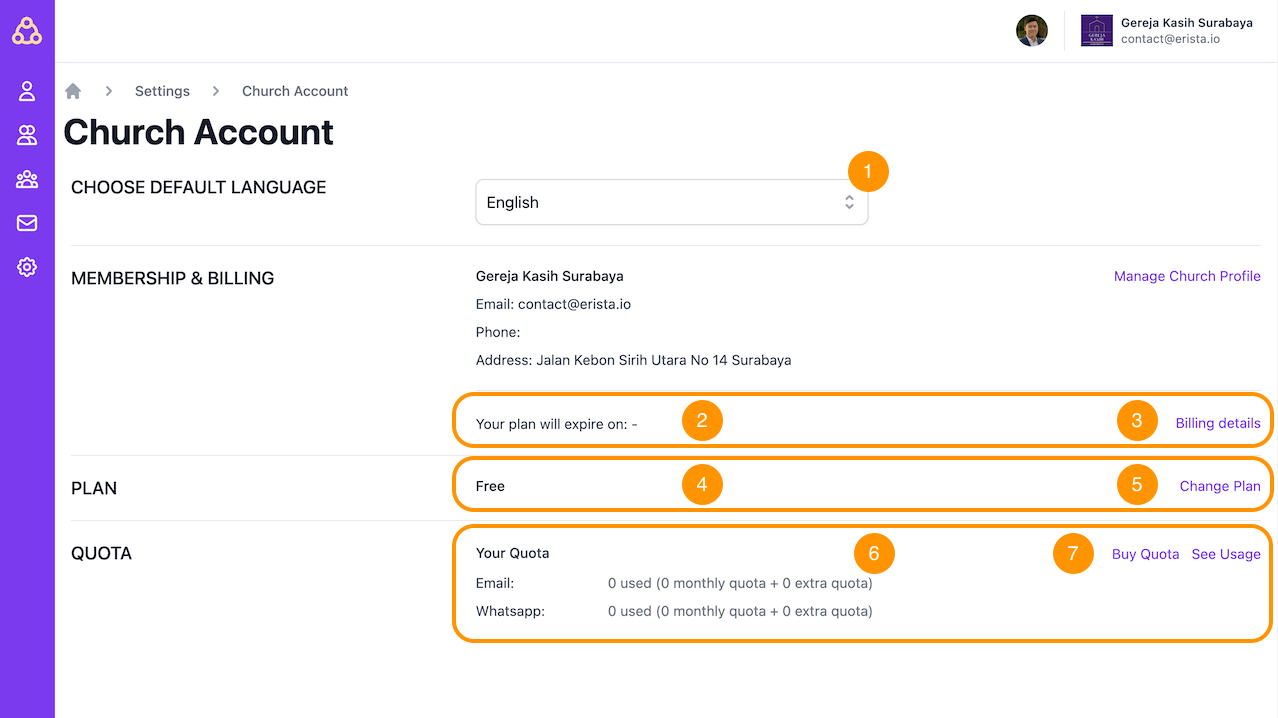
On the Settings menu, you can find all information about your Erista account. On the Account Settings page, you can do the following:
- Changing the interface language
- See the validity period of your Erista account
- Menu to view payment details
- Current Erista account status
- Menu for upgrading your Erista account
- View the current communication quota status
- Menu for buying quotas and viewing the history of quota usage

How to change the interface language
To change the Erista interface language:
- Make sure you are on the Account Settings page
- In the Choose Default Language section, replace the dropdown with the desired language
Erista account settings
How to upgrade your Erista account to Starter or PRO
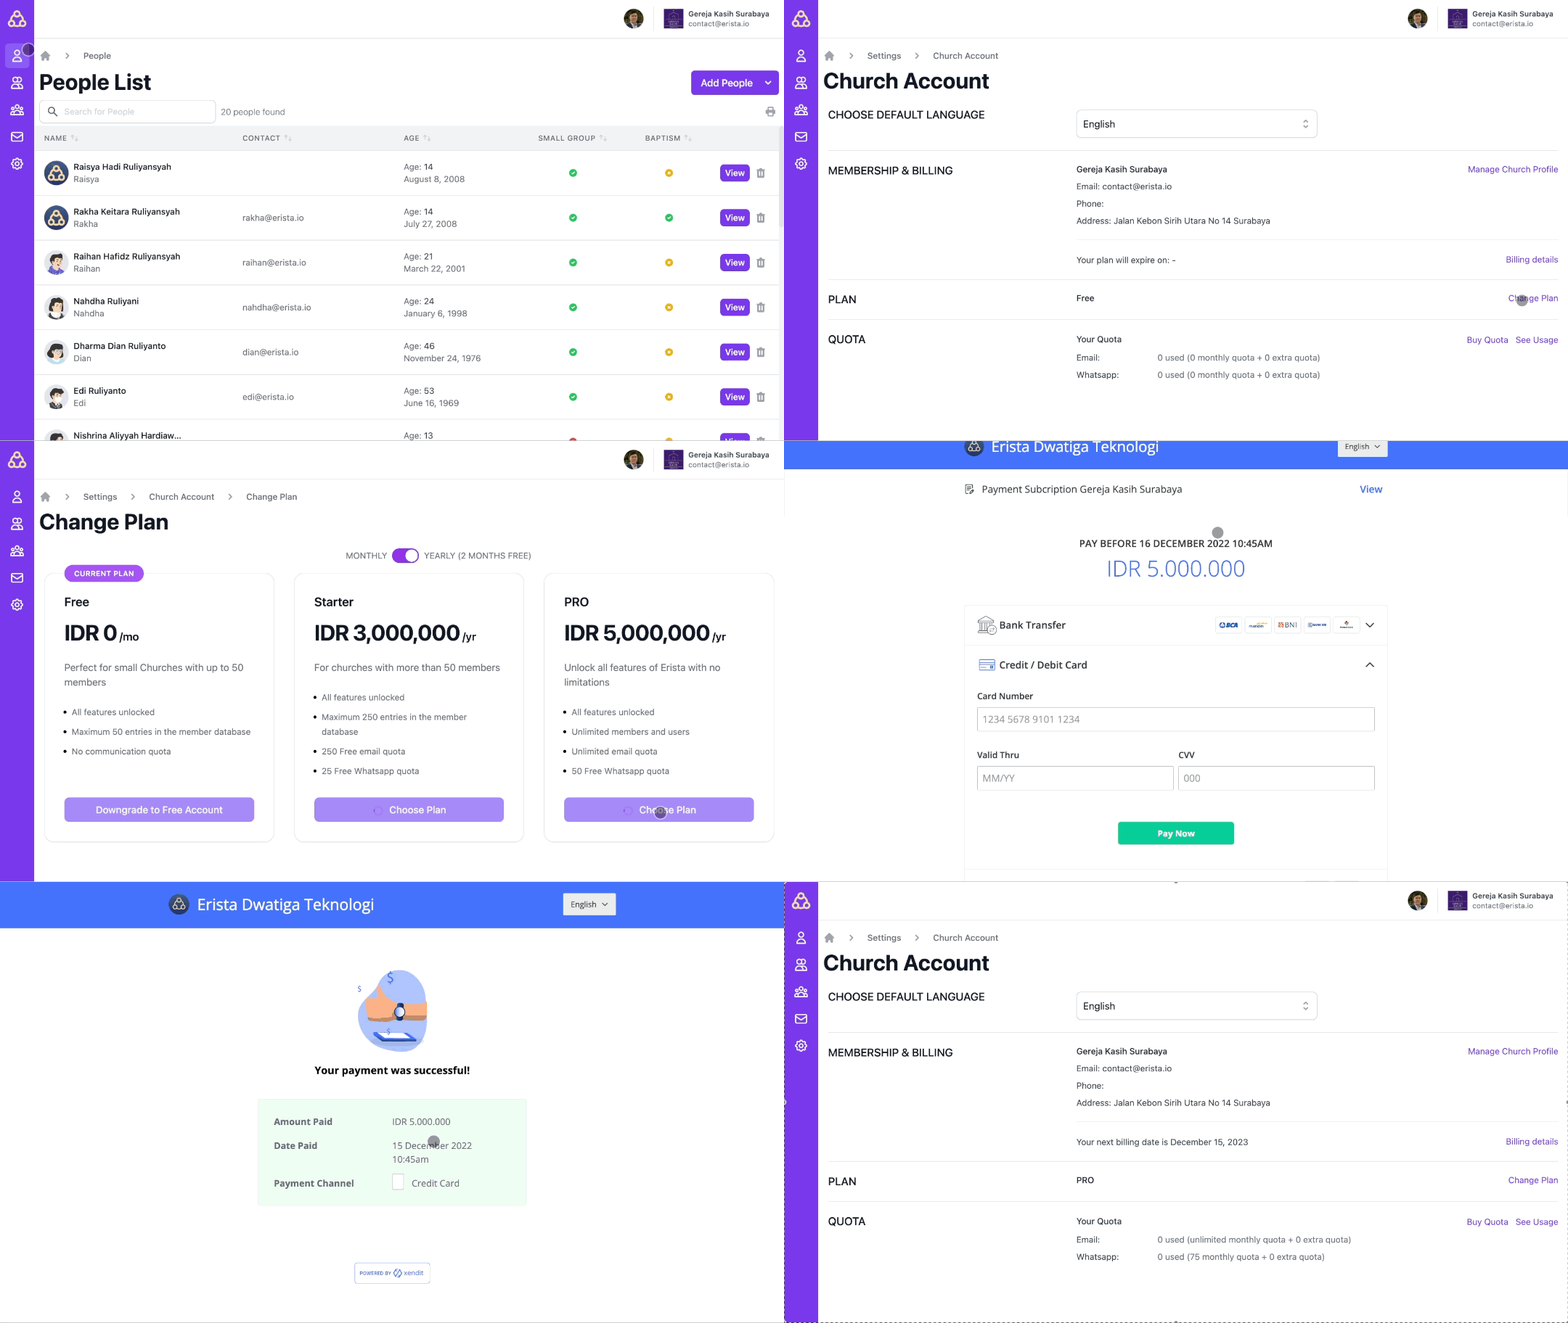
To upgrade your Erista account, follow these steps:
- Make sure you are on the Account Settings page
- In the Plan section, look for the Change Plan link
- On the Change Plan page, you can choose a monthly or annual plan option
- Press the Choose Plan button on the desired plan section
- On the Checkout page, press the I Agree button then press the Continue to Payment button
- On the payment page, please choose the payment method that is suitable for you, then complete the payment.
- After the payment is successful, the system will automatically change your account. To be sure, do a reload or refresh on the Account Settings page

Where is the invoice for payment?
After making the payment, the system will send a confirmation via your registered church email address along with the invoice number in it. Apart from that, you can also view invoice history on the Billing Details page. If you need an Invoice in pdf format, you can contact us directly via email to finance@erista.io
See the validity period of the Erista account
The expiration date will appear only if the currently active plan is Starter or PRO. To see the expiry date of the Erista account:
- Make sure you are on the Account Settings page
- In the Membership & Billing section, the expiration date of your account will appear.
How to extend your account period
You can extend the active period of your account before the active date ends. This can prevent your account from being automatically downgraded by the system. To extend the active period of your account, follow these steps:
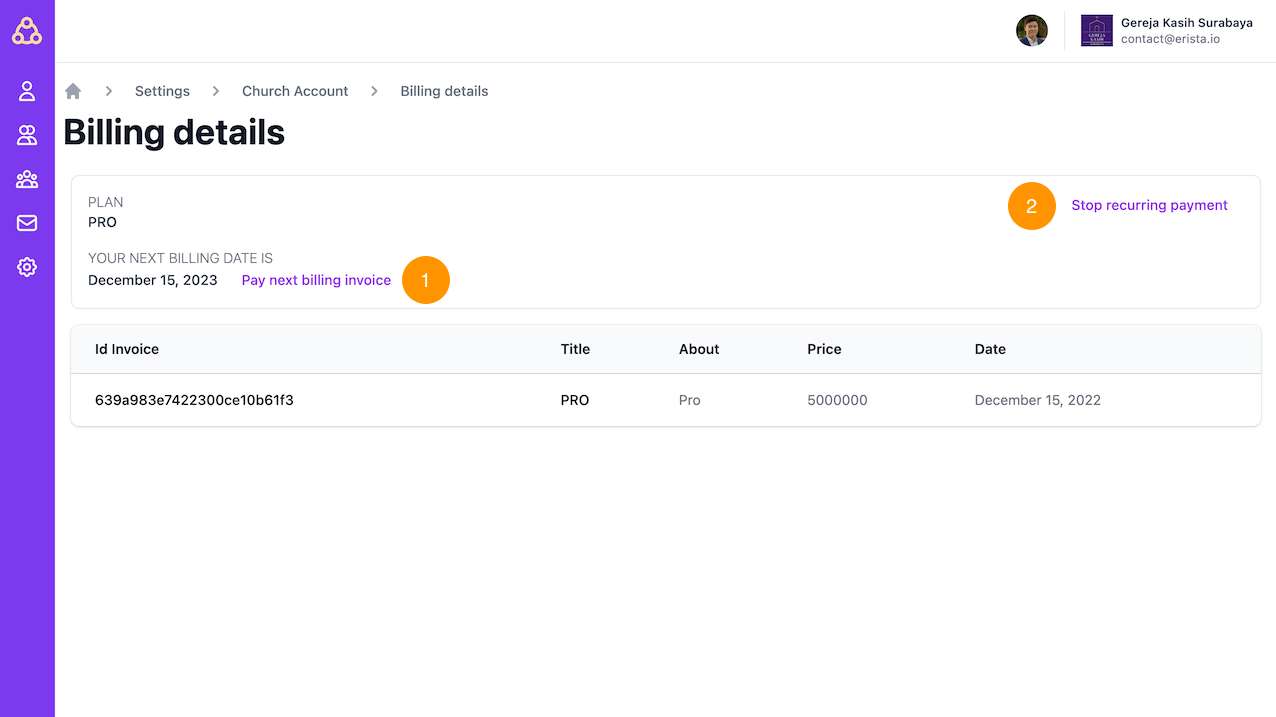
- On the Account Settings page, go to the Billing Details menu
- Press the Pay next billing invoice button (number 1 in the image below)
- After you make a payment, please reload or refresh on the Billing Details page

How to stop automatic billing via credit card
If you make a payment via credit card, the system will automatically renew when the account's active period ends. To stop automatic billing, you can follow the following procedure:
- On the Account Settings page, go to the Billing Details menu
- Press the Stop recurring payment button (number 2 in the image above)
- If a successful message has come out, then your account will no longer be renewed automatically.
The Stop recurring payment button will not appear if you are not on recurring payment.
Communication Quota
View the available communication quota
To view communication quotas, follow these steps:
- Make sure you are in the Account Settings menu
- In the Quota section, there is an explanation of the available quota on your account
Monthly quota usage vs additional quota purchased
If you still have remaining free monthly quota, the system will automatically use the free quota first. The additional quota will be used only if the free quota has been used up.
Here's an example of how to read your quota: Email, 10 used (250 monthly quota + 1000 extra quota)
- 10 used: You have used 10 of the available 250 monthly quotas
- 250 monthly quota: your account gets 250 monthly quota for free
- 1000 extra quota: your account has the remaining 1000 quota that was purchased
When is the quota period?
Free monthly Quota will be renewed on every first day of each month.
How to buy additional communication quota
If your communication quota runs out, then your account cannot use communication features on Erista, including Communication, Auto Messages, Scheduling. If you want to buy additional quota, follow these instructions:
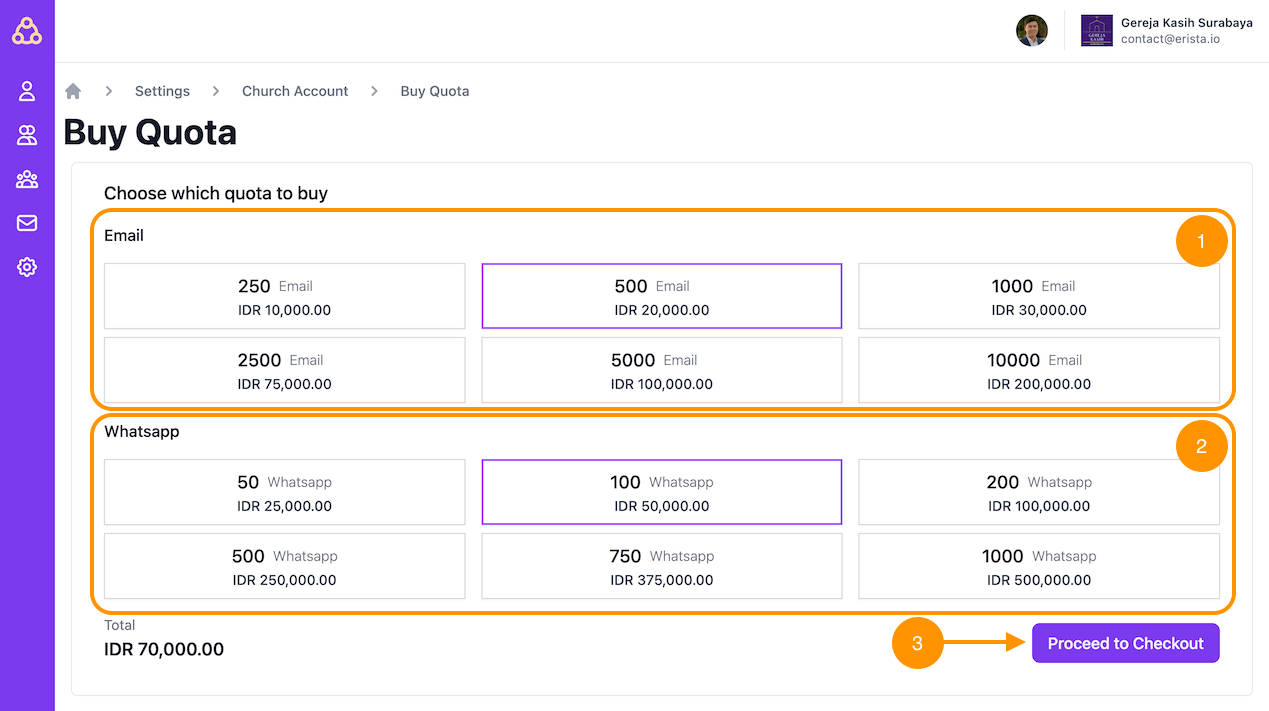
- Make sure you are on the Buy Quota page
- Choose the quota that suits your needs
- The quota for Email is in box number 1 in the image below
- The quota for WhatsApp is in box number 2 in the image below
- After selecting a quota, press the Proceed to Checkout button and make a payment
- If the payment has been made, the quota on your account will automatically increase. Please reload or refresh on the Account Settings page.
