Settings
Users & Roles
Roles & Permission
The Roles & Permission menu is a place where you can manage Erista users in your church. We recommend that each church administrator have access to Erista so that they can collaborate together using Erista.
Some of the things we recommend are:
- Every Pastor of the church has access to Erista
- Each cell group or Small Group leader has access to Erista
- Every ministry group leader or Ministry Group has Erista access
- Every church admin or caretaker has Erista access
User is free
Your account can have unlimited number of users, and it is free. You will not be charged for inviting a new user.
How to create a new Role
Erista already has several default roles: Admin, Pastor, and Group Leader. However, if you need a special role, you can create it through Erista.
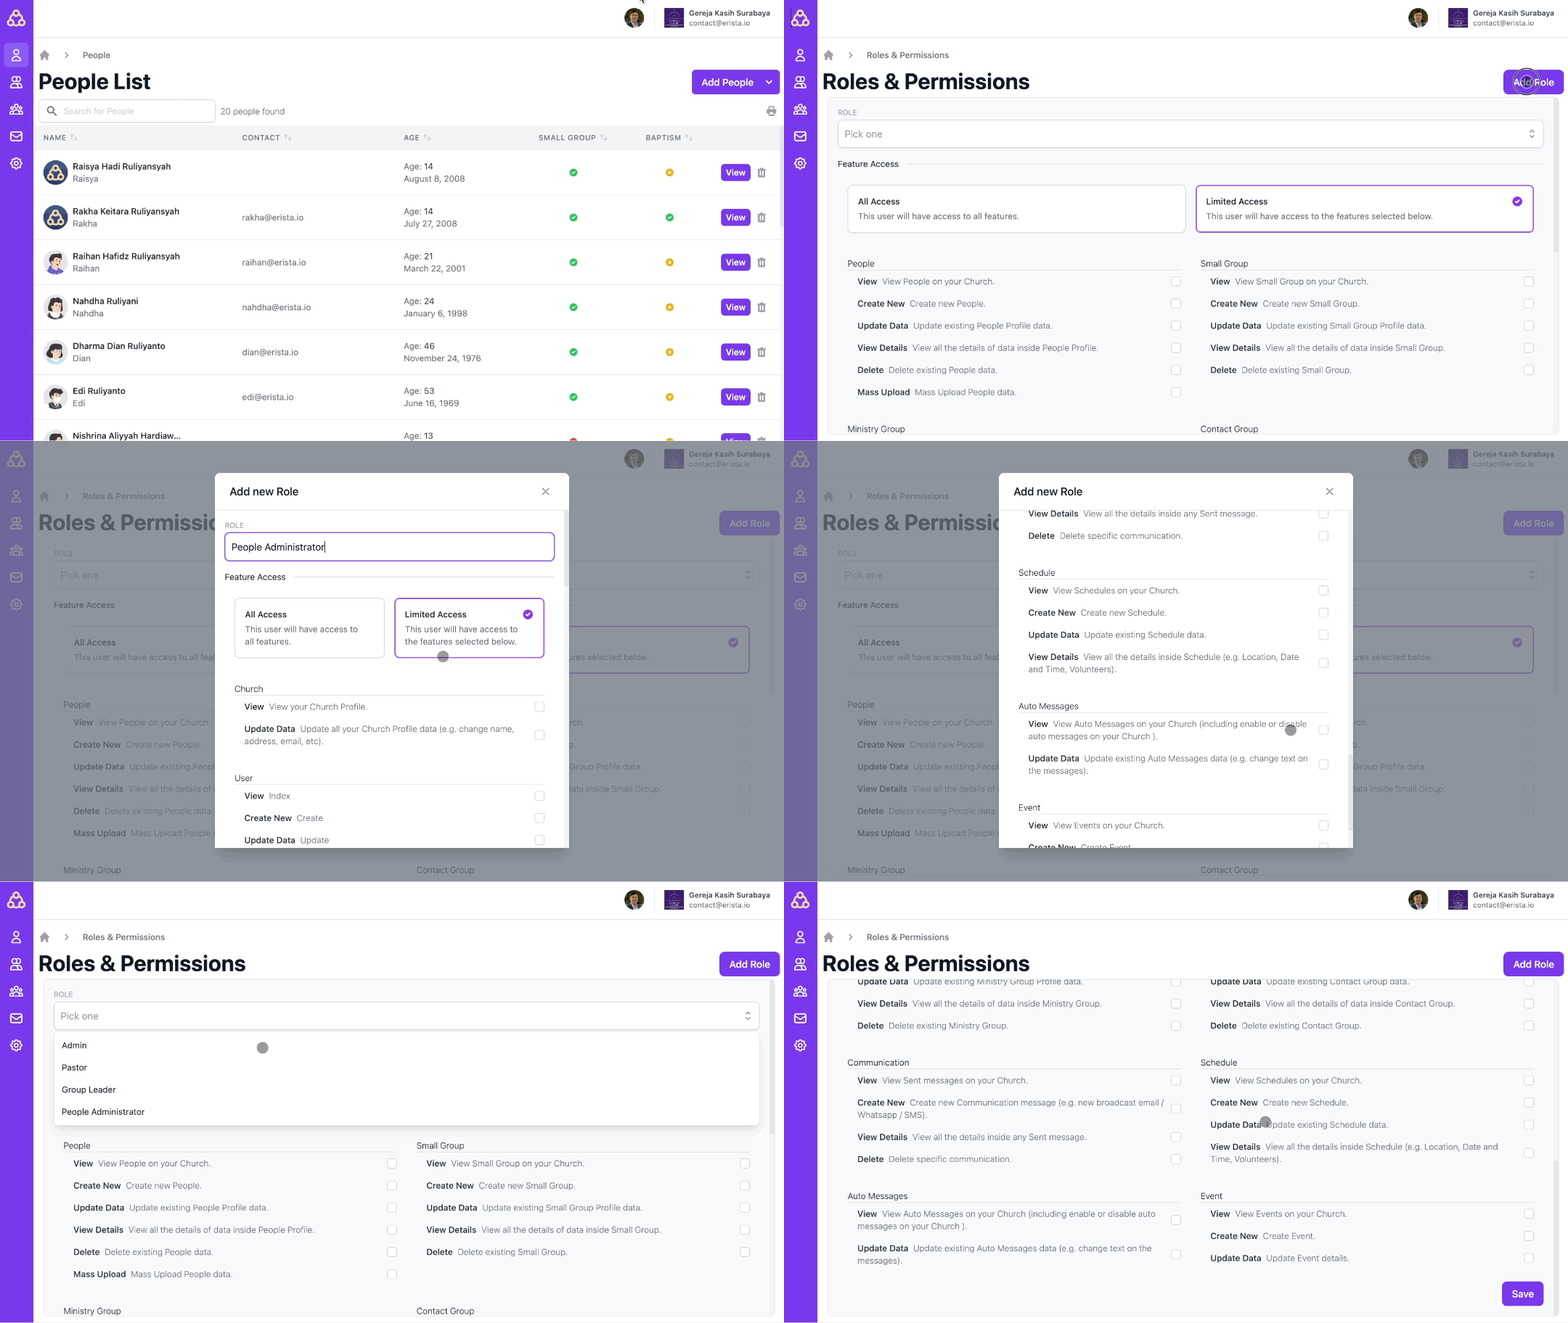
Here's how to create a new Role:
- Make sure you are on the Roles & Permissions menu (the menu is located under Settings)
- On the Roles & Permissions page, click on the Add Role button
- After the Add Role window comes out, first enter the desired role name
- After that, choose between All Access or Limited Access. Users with All Access will be able to access all Erista menus.
- If you choose Limited Access, then you can choose what features to give to that Role (permissions). Permissions can be granted by checking the buttons available next to each permission.
- After that, don't forget to press the Save button at the very bottom.

How to change a specific user's Role
- Make sure you are on the Roles & Permissions menu (the menu is located under Settings)
- On the Roles & Permissions page, click on the existing Role option and select the Role you want to change
- After the intended Role has been selected, change the permissions according to your needs by pressing the check or uncheck button located next to each permission.
- Don't forget to press the Save button when everything is finished. Changes will be immediately active after you save.
The Administrator role cannot be changed
By default, the Administrator role on Erista cannot be changed and has all access to all Erista features.
Manage Users
How to invite new users
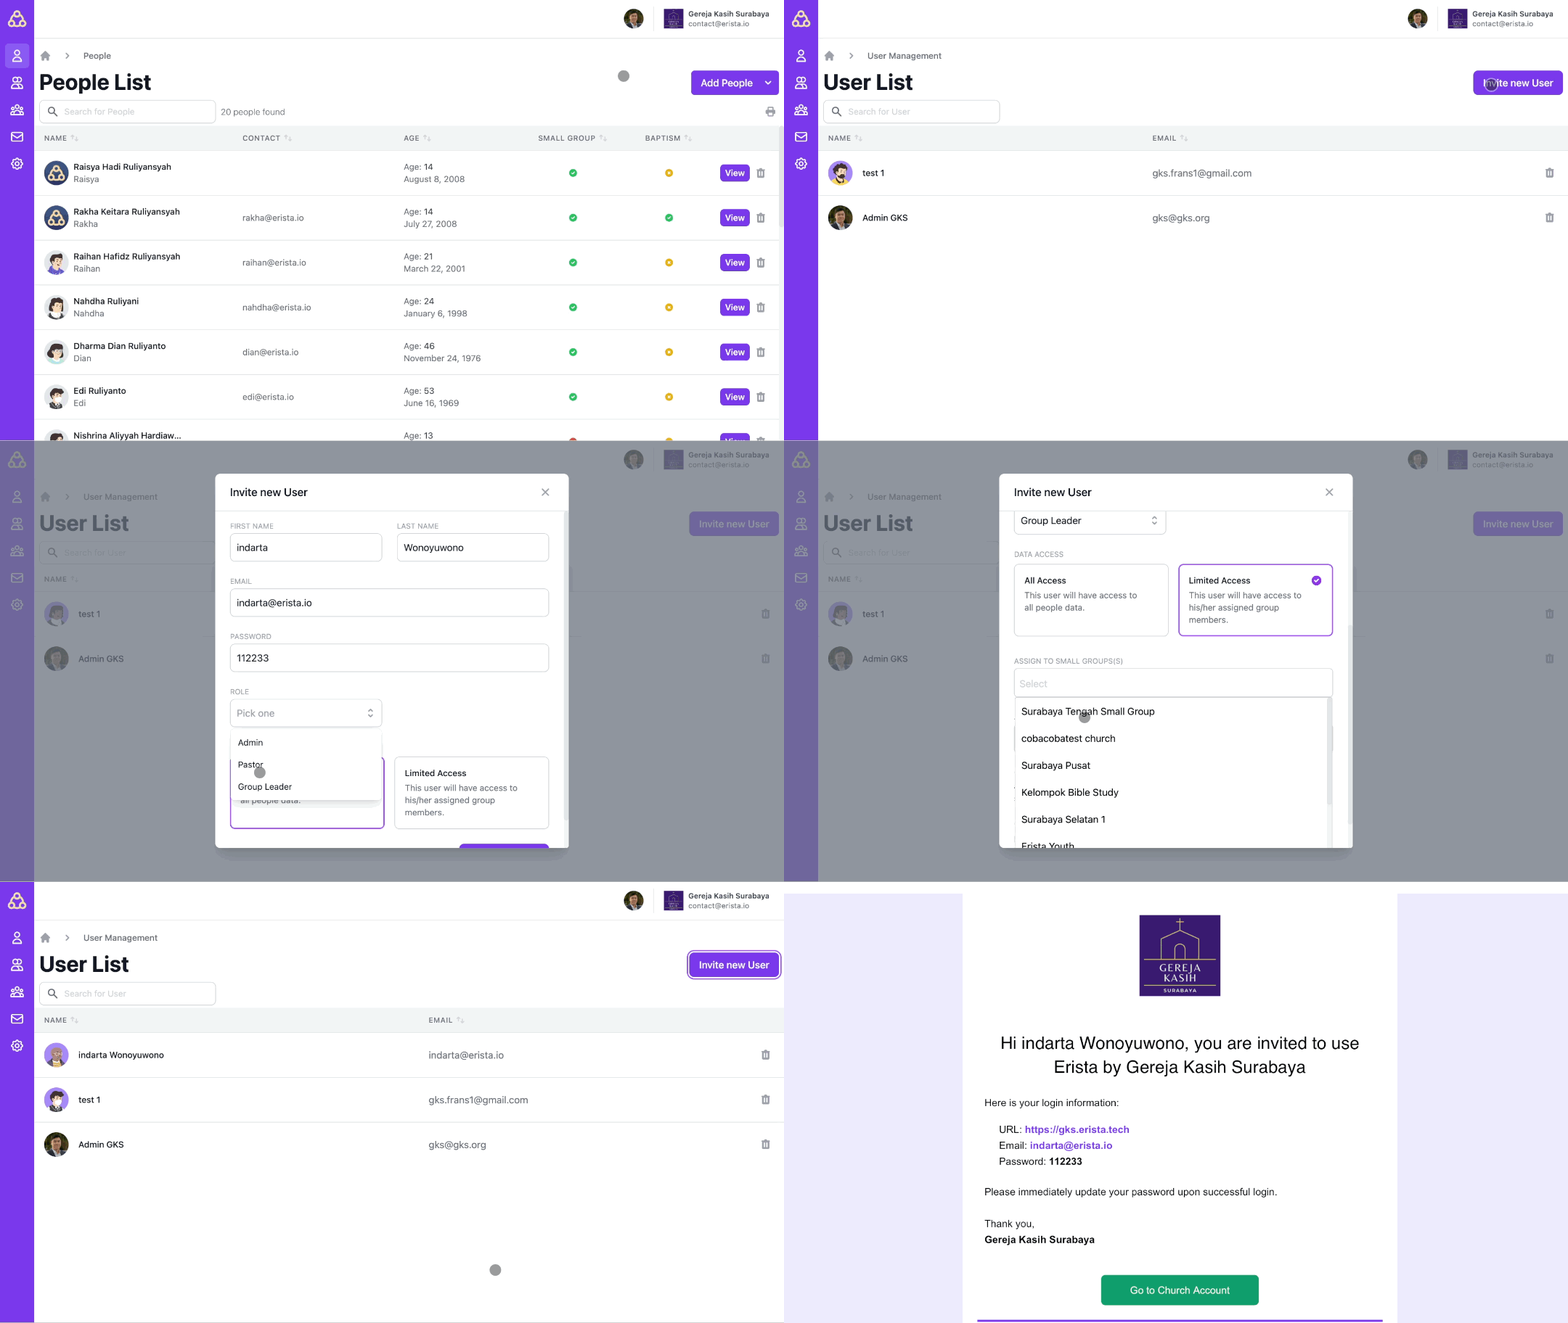
To invite new users to your church's Erista account, follow these steps:
- Click on the top-right (church name) and select the Manage Users menu
- On the Users List page, click on the Invite new User button on the top-right
- After the Invite new User window appears, first enter the first name and last name of the new user you want to invite
- After that, enter the email address and temporary password that will be given to the new user
- In the Role section, choose the role that best suits the new user
- In the Data Access section, select All Access if the new user is given access to all church congregation data. Choose Limited Access if the new user is only given access to some church congregation data.
- If you select Limited Access, an option will appear to provide data access to certain Small Groups or Ministry Groups. Choose the Small Group or Ministry Group that will be given data access for the new user.
- After that, press the Save button at the bottom of the window. After the Save button is pressed, Erista will send an email to the new user so that he can access Erista.

What can users with limited access see?
If a user is granted limited access to data, that user can still see general church congregation information such as full name, email address, telephone number, birthday, and also baptism status. However, they will not be able to see other information such as home address, family, and other erista data such as attendance data, user record data, other group data, and so on.